There are tons of tutorials out there on how to paint stripes, so I won't completely bore you with another one of those, but I'll go through really quickly how I got my clean and straight lines on the walls of my guest room/office space.
Before I started, I looked around the web and found a great detailing of "how-to" by Young House Love
I used their ideas and also remembered this post on additional tips from Centsational Girl
When deciding on how many stripes to have, I was most focused on making sure I didn't have to edge either the ceiling or the baseboard trim, so I chose an odd number of stripes to keep the top and bottom a white stripe. The width was determined by me based on my wanting to avoid both the curtain rod at the top and the baseboard heater at the bottom. So that's how I ended up with 9.7" per stripe (or something like that).
First of all, my husband helped me to get the the lines perfectly straight by holding a laser level (that made the most ANNOYING SOUNDS EVER!) while I ran the tape along the walls. This process took about 4 hours total and we did it over the course of 3 days (I don't like to stress him out too much and honestly, I couldn't handle the buzzing of the laser level for long periods of time).
I apologize for the quality of the photos. Some are from my phone and though my photos have been restored to my computer since my hard drive crashed, I'm unable to edit any of them. I need to take it back to the guys at the computer store to have them help me fix it.


I painted over all the tape lines with the cream paint (SW Aria Ivory) that was already on the walls. The paint seals the edges of the tape down to prevent bleeding.

I let that dry and then painted 2 coats of the darker color in their appropriate lines (Valspars Elephant). While the paint is still wet, pull off the tape. That will prevent the paint from chipping.

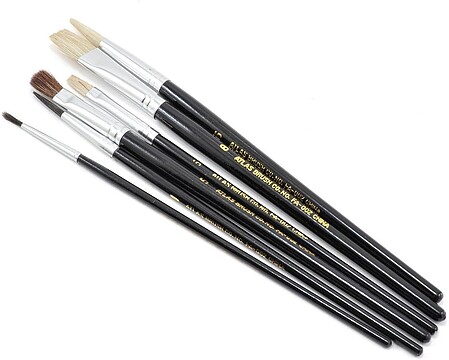
After that was done, I had a paint brush for each color (I keep them inside a plastic bag until my project is done to cut down on paintbrush washing). I did the larger touch ups, and then went over the few teeny tiny bleeds that made it through with little paint brushes (1 for each color).
This part took another hour or two.
Because I was going for perfection with this project, unlike my typical processes, taking the extra time to clear those details made all difference. The stripes are dynamic and so worth the effort I put in. I'm very happy with the outcome.


Project Featured at:

Linking to:
My entry into The DIY Dreamer... From Dream To Reality sponsored by Appliances Online and their best Range Cookers.
Linking to:
My entry into The DIY Dreamer... From Dream To Reality sponsored by Appliances Online and their best Range Cookers.


Wow, you did a great job! True perfection. Your newest follower from the Mes Préférés party! :)
ReplyDeleteKathy @ http://lifeonlakeshoredrive.blogspot.com
Great job! That took a lot of patience! ;-)
ReplyDeleteBlessings,
Jill
Here from My Romantic Home, I love your project and the bovine print with the stripes is fabulous :)
ReplyDeleteHugs, Tanya
They look great! Love the light fixture too:)
ReplyDeleteWow, that looks very nice! Beautiful job! Liz
ReplyDeleteIn love! And those cows... where are they from?! I grew up in Indiana and have some serious cow nostalgia :) I think I could work that in my house some where.
ReplyDeleteI would love to do this in our bathroom we are remodeling, but I think my husband would kill me! Your room looks great!
ReplyDeletestripes are really making a come back and your room looks wonderful!
ReplyDeleteYou and your hubby did a fantastic job!love the color too!
ReplyDeletesmiles, alice
I absolutely love your room. the strips, the COW picture, you new vintage wire light, everything. A really gorgeous room- great going! So glad you shared your creative inspiration with Sunday’s Best – your creativity helped make the party a success!
ReplyDeleteI admire anyone who paints stripes. I'm afraid I could never pull it off as beautifully as you have. It's a show-stopper.
ReplyDeleteAhh stripes, I think they are the bane of my husband's existence but I love them. I had never thought to paint the tapeline first. Thanks for the tips.
ReplyDeleteIf you get a chance come link up this tutotial at my Pin Party.
http://sarahdawndesigns.blogspot.com/2012/07/pintastic-monday-link-party-2.html
We are twins! I have grey striped walls in my house too... but I have to admit yours are sooo much better!! haha I love the darker grey you chose and how they wrap around the room! next time I am going to have to follow your instructions! I'm so glad I found your blog.. I am your newest follower! If you ever have a chance come check out mine!
ReplyDelete-Peggy
Love this, I really want to try this in my master bath :)
ReplyDeleteI found you over at Southern Institute
Great tutorial. I love the stripes. I want to do that on one of my walls at some point. Thanks for sharing at DIYbyDesign.
ReplyDeleteWow! Your finished results look gorgeous... Not sure I have the patience for it though. :)
ReplyDeleteOh my gosh I love it! The stripes look so good and perfect!
ReplyDeletewww.iheartpears.blogspot.com
I LOVE your stripes!!!! It looks really great! Thanks for explaining why you put the tape down and then paint over them.. I was wondering why!
ReplyDeleteThanks for sharing this at The DIY Dreamer.. From Dream To Reality!!
Love the whole room! It looks amazing.
ReplyDeleteI just started doing the same thing and it totally works PERFECTLY! I'm featuring your awesome room tomorrow!
ReplyDeleteXO, Aimee
Wow, your stripes look perfect!
ReplyDeleteSoooooooooo pretty! I love love love stripes and the colors you chose are just gorgeous. Thank you so much for sharing your projects at my Throwback Thursday party, I'm so happy to have you! And I hope you'll be back again this week! :)
ReplyDelete